Thursday, May 25, 2017

WOW Project Ceramics

Our last project for my ceramics class allowed me to make anything I wanted, which makes everything to make become a possibility. To narrow the ideas down I decided to think about things I inspire to, and I will go on from there. The first thing I chose is grasslands. I chose this because this shows my inspiration of grasslands in my home country. I live in a village house back in Indonesia and I am surrounded by grasslands and wheat fields, every time I look around it's the flat surface of the earth terrain. The second thing I picked was the idea of deforestation around my country and village. Every year I see the grassland decrease in its surface area to make space for either animals or industrial factories. I am really against the fact that nature is being destroyed to jus make space for things like factories. And from that point, I knew what to make. I wanted to make a ceramics pieces that had grasslands surrounding a tree, and at the base of the tree I will write, "Don't Cut." 
That is what I wanted to make for the last month of the class. I made the piece with lots and lots of slabs put on top of each other. And each slab gradually gets smaller as the height increases. In middle of the piece, I will put a pole representing the trunk of the tree, and from there I will build up the leafs from there. The base of the tree, I will put a slab of clay standing up which will be the area where I write the words. I used only one main technique to execute the piece. Even though it is only one technique, it made my piece what it is. Slit and score was the technique that I used to hold everything together, especially the tree. Without the slit, I am pretty sure that the tree won't hold its weight up and it would probably break down. Some methods I used throughout was just basically blending the clay with each other at places where it is needed.
Picture was taken by me
This brings me to the challenges that approached me and how I had to overcome them in a limited amount of time. One of the problems was trying to get the trunk of the tree not break, the first time I made it, when it was dried up the trunk broke off the main part of the piece. I fixed this situation by adding clay to the base of the trunk to make it more stable, and I kept doing that until I felt that it was sturdy enough. Another thing was the tree leafs, I initially wanted to do a 2D leaf on top of the trunk, but everything I put it to place it always seems to snap off. So I decided to make it like a lego tree where it extends in all directions instead of one. This allowed me to have more structure to my tree, which made it so much bolder and stronger.
One of my friends actually came up with the Idea of putting the tree in the middle of the grass fields, I think that was the most influential feedback because it added another aspect to my piece that was significant. I think my piece it very original because of the meaning behind it and the design, even though the tree is conventionally used in many things, I used it in a unique way, to show the importance of nature. For the grasslands, I think the idea of the lands from my home country is original and I was able to replicate that to a ceramic piece.
Creativity can be practice many times in a day, for me it comes naturally. If I have to think of something for a school work that includes creativity, I flash back into my memory and rethink what I thought recently and bring that thought back. It can be practiced by just noting everything down, whatever you think, jot it down. Maybe at a certain time, you could combine ideas to make something very original and unique. 
References:

Colonel Bill De Marco. Creativity. Digital image. N.p., 26 June 2015. Web. 26 May 2017.

Rhett Butler. Deforestation. Digital image. Mongabay. N.p., 29 June 2014. Web. 26 May 2017.


Terrace Rice Fields. Digital image. Ezroadtrips. N.p., n.d. Web. 26 May 2017.


Monday, May 8, 2017

Empty Bowls 2017


Empty Bowls encompasses the idea of making bowls for a charity program. Throughout the semester we spent a decent amount of class time to produce bowls from ceramic clay. And no doubt, I had many challenges along the way while making the bowls. One challenge that approached me was when every time I flattened the ball of clay into a flat piece with the slab roller, I always made it too thin. I then realized that I needed to make the clay at least a tiny bit thicker than 1cm, so I can work with the clay without tearing it. Smoothing out the bowls was very frustrating to me, because I always try to smooth the surface of the bowls, but every time it dries out, there is always a hole or an uneven surface on it. This became one of the challenges I faced since it happened many times. To fix it, I decided to smooth the surface with a smoothing tool frequently so it won't have the unnecessary surfaces on the bowl. Another challenge that I experienced was thinking of 5 separate, different designs for my bowls. I overcame this challenge by searching the web for some designs that I can incorporate into my bowls. One design was by Jun Kaneko, his patterns is basically stripes that overlap each other in many ways, the colors are mainly black and white which gives emphasizes the contrasts on the piece. Here is one of the piece that I tried to incorporate. However, I didn't have enough time to completely make a bowl with this design because of the timing in our class. This is one of the 5 bowls I made for the project, also this is one of my favorite ones since I added many patterns to the sides of the bowl.
Picture By Me
           I think this project was very meaningful to me and for the country I live in, because in my country many people are living days without food to eat. They would have to walk along the streets asking for money to get food. Making bowls to help people get food really connects me with this social problem. Every time I make a bowl I feel like I can facilitate people around the country in need for food. The bowls that we made are sold for money and the money that is accumulated will be sent to a organization to help people that are ravenous and dire for food. This makes me happy to know that the bowls that my classmates and I are making, is making a difference to world hunger even though it is only a small scale.
          I think Empty Bowls 2017 was very successful so far, considering the fact that we had only 1 day to sell the bowls to give people to. By the end of the selling session we raised 300 rials for the organization. We also plane to keep selling the bowl during our lunchtime to see how much money we can raise before the end of the school year. Other than the money, I think mutually, everyone that participated on making the bowls helps the project to make it successful. My classmates and I spent our time to make bowls to raise money and everyone had a part in the project. I am pretty sure that the organization, Action Against Hunger, will be grateful to receive money from our school that worked really hard to make this fundraiser happen. In general, Empty Bowls should continue in our next school year, this helps us understand what other people in the world are going through, and we can help them to experience eating food like we all do.

References:
Armin. Action Against Hunger. Digital image. Brand New. N.p., 1 Nov. 2016. Web. 9 May 2017.

Flavio Dandy. Empty Bowls. Digital image. N.p., 9 May 2017. Web. 9 May 2017.

Jun Kaneko. Dango Glazed. Digital image. YMFA. N.p., 2007. Web. 9 May 2017.


Tuesday, April 18, 2017

Ceramic Tile Project

In ceramics class we started a new project. The new project that was introduced to us was quite simple the first time I heard it, but I knew that it would take a lot of technique and skill in order to execute the project. The basic idea of the project is that we had to create a ceramic tile- around one cm thick- and transfer a selected image that we chose and replicate it to the tile. There are endless possibilities to chophouse from, but I finally made up my mind and decided to choose an image from Pablo Picasso's artworks. The piece is called Les Demoiselles d'Avignon. If you want to see other works from Pablo Picasso. This what it looks like:

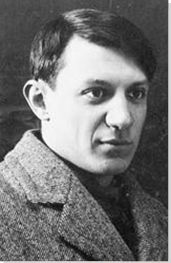
 Pablo Picasso: He was a Spanish painter, sculptor,  print maker, ceramicist, stage designer, poet and  playwright. As you can see he was a very talented individual, doing many occupations and was able to them at a high standard. Pablo Picasso lived in Spain for most of his early life, he then lived in France for the majority of his adulthood. Pablo Picasso is considered to be an old artist—he was born in 1881-1973— since his life was during the late 1880s to early 1970s. Learning more about Pablo would be good to have an insight to art.


Why I Chose this Piece? 
I chose this piece because the artwork seems very abstract to understand the concrete meaning. As a person that really
 like to solve things, I like that the piece is somewhat abstract, this makes me have the desire to be able to understand the meaning. As you see in the work, Pablo Picasso placed many related colors to create unity. He also took many random polygons and shapes to create a defined structure of the human face, neck, and maybe an arm.

Process:
 First, we had to start with wet clay, and place it on the roller to create a flat, smooth tile. After we got our flat clay done, we had to transfers our picture to the tile. There are 2 way to transfer it to the tiles. The first one is just a classic outline of the picture with a sharp edge. Once it is transferred we clean up the sketchy edges. The second way to transfer the image to the tile is using graphite. Basically, we just color in the back of the paper with graphite, and after that we place the paper on top of the tile. Once the paper has been placed, using a pencil, we had to carefully trace the picture down to the tile. The video attach is not exactly what is done in our class but it shows what the basic idea of transferring an image to another surface. When I worked with my tile, I used the graphite method because it seemed easier to do. After the clay is all dried up with the transferred image on it, we had 2 choices, either under glaze the clay with the colors, or just put it in the kiln and wait to glaze the image with the designated colors.
This is the tile before it was put into the kiln:
Since my piece has many shapes and piece making the image, I decided to just put a hold on it and wait until it goes out from the kiln to glaze it. I am really proud pf my ceramic project, I was able to transfer Pablo Picasso's art to the tile. I think the colors that I will paint on the tile will make the project have the same sense of principle, unity, that the original piece had. I think I did a really good job on getting the shapes of the piece to have the same effect of abstractness to the viewers as the original did too. This has been one of the pieces that amazes myself judging that it is my first few months getting into ceramics.


References:
Bliss, Lillie P. Les Demoiselles D'Avignon. Digital image. 
        Wikipedia. N.p., n.d. Web. 24 Apr. 2017.
How to Do Pyrography. Prod. William Mickelboro. Perf. 
        Expert Village. N.p., 3 Oct. 2007. Web. 24 Apr. 2017.
Pablo Picasso. Digital image. The Art Story
        Modern Art Insight, n.d. Web. 24 Apr. 2017.

Monday, February 6, 2017

Monster Pot Reflection

Throughout this Ceramics class, our class worked on our first project. The project we worked on was the monster pot. Considering the fact that this is my first time producing a ceramic object, it was moderately hard for me to follow the process of making a monster pot. Despite my experience, I kept on going and just went on and made my pot.
          The first step was altering the wet plastic clay, during this process I was able to create the monster I invisoned. As I went on, I decided to put horns, and wings. One of the techniques that I used to secure the body parts to the body was the slit and score technique. This certain skill made the body parts stick to the body and won't dismantle when it dries up. As the picture shown below, the monster held its base when it transferred to the 'bone dry' Stage.
Bone Dry
During the bone stage, I took advantage of the sturdiness of the surface and did the black slit technique. I used this technique to emphasize the white surface of the monster. First, I covered some areas of the surface with black slit and used tools to carve out textures for the body and to outline the teeth. After putting it in the kiln, the monster went to the bisqueware stage, in this stage my monster showed space and contrast all around, this is the picture.
                                    
Bisqueware 
Finally, after I glazed the mouth red, I realized that using the slit, score and black slit technique it really brought my monster together, and created unity throughout the piece. Also, since I created contrast on the back my monster, the pattern of the textures really stood out with the blackness of the surface and the redness of the mouth. One thing that frustrated me the most while doing the techniques, was when I did the score, slit skill. I get frustrsted because once in a while the part that I scored and put together sometimes falls off, and I have to redo the process again. In the end, redoing the techniques really enhanced my monster after it went out to the glaze ware stage, and made me feel good about my first ever, clay project.
Glazeware